

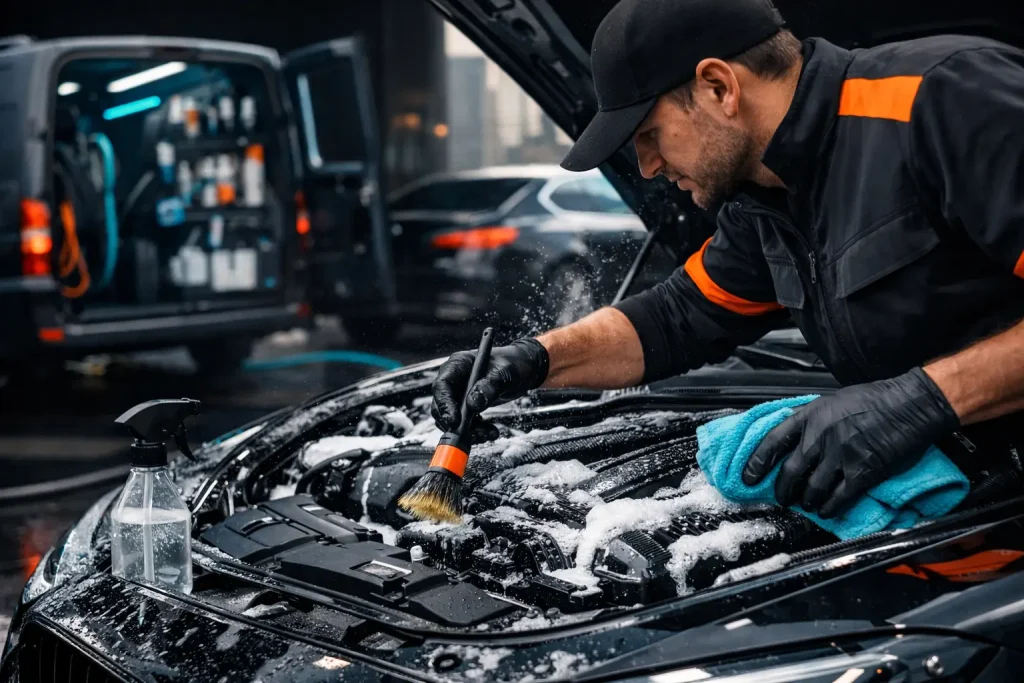
A clean engine bay changes the way a vehicle feels when you lift the hood. Dusty covers, oily residue, and faded plastic can make even a well-kept car look neglected, while a carefully cleaned bay signals consistent care. Knowing how to clean engine bay surfaces safely is less about soaking everything in sight and more about using controlled moisture, suitable products, and a patient finish.
For busy vehicle owners, this is one area where precision matters more than speed. Modern engine compartments contain sensors, electrical connections, insulation, and delicate plastics. The goal is to remove grime and restore a clean, factory-fresh appearance without forcing water where it does not belong.
When an Engine Bay Needs Cleaning
There is no need to clean under the hood every week. For most regularly driven vehicles, a light engine bay detail every three to six months is enough to keep dust, road film, and minor leaks from building up. Cars parked outdoors, driven through construction zones, or used frequently in hot, dusty conditions may need attention sooner.
Cleaning also makes practical sense before selling a vehicle, after a repair that left fingerprints or fluid marks, or when you are preparing for a full detail. It can make it easier to spot a fresh oil leak, cracked hose, or worn belt during routine checks. That said, cleaning is not a substitute for maintenance. If you see pooled fluid, a strong fuel smell, exposed wiring, or heavy oil buildup, have the cause inspected before washing the area.
What You Need Before You Start
The safest results come from gentle, purpose-made products rather than household cleaners or a high-pressure spray. Prepare a quality engine-safe degreaser, all-purpose cleaner suitable for automotive plastics, soft detailing brushes, microfiber towels, a low-pressure water source, and a non-greasy trim protectant.
A leaf blower, compressed air, or a dedicated drying blower can be useful, but it is not essential. The key is having enough clean microfiber towels to blot moisture from tight areas instead of leaving water to sit around connectors and seams.
Avoid harsh wheel acid, oven cleaner, solvent-heavy products, and thick silicone dressings. They may create a temporary shine, but they can stain aluminum, dry out rubber, leave slippery residue, or attract more dust. Premium care should look clean and natural, not excessively glossy.
How to Clean Engine Bay Without Causing Damage
Start with a Cool, Dry Engine
Park the vehicle in a shaded, well-ventilated area and allow the engine to cool completely. Cleaning a hot engine can cause products to dry too quickly, leave marks on surfaces, and create steam where it is least welcome. A cool engine is safer for you and gives cleaners time to work evenly.
Open the hood and remove loose leaves, sand, and debris by hand or with gentle air. Pay attention to the cowl area near the windshield, hood hinges, and corners of the bay. This dry step prevents loose dirt from turning into muddy streaks once moisture is introduced.
Protect Sensitive Components
Most modern engine bays are designed to handle rain and normal road conditions. Still, direct water pressure is unnecessary. As an added precaution, cover exposed aftermarket wiring, open cone air filters, damaged electrical connectors, and visibly vulnerable fuse boxes with plastic bags. Do not tape bags tightly to hot components, and remove them as soon as the cleaning process is complete.
If your vehicle has a known electrical issue, a cracked engine cover, loose wiring, or an unfamiliar modified setup, skip the DIY wash. This is a situation where trained detailing staff can assess the bay and clean it with the right level of moisture and product control.
Apply Cleaner Sparingly
Mist your cleaner onto dirty painted sections, plastic covers, rubber hoses, and the underside of the hood. Start with a small area to confirm compatibility, especially on older vehicles with faded plastics or uncoated metal. You want the surface evenly dampened, not dripping.
Let the product dwell briefly according to its instructions, but never let it dry. For light dust, an all-purpose cleaner diluted appropriately is usually enough. For oily residue around the engine cover or lower sections of the bay, use an engine-safe degreaser only where it is needed.
Agitate Gently, Then Rinse Lightly
Use soft brushes to loosen grime around caps, badges, seams, and plastic textures. Work with light pressure. Aggressive scrubbing can lift aging decals, scratch painted surfaces, and damage brittle clips.
Rinse with a gentle stream of water or a spray bottle. Keep the nozzle at a distance and avoid aiming directly at electrical connectors, alternators, fuse boxes, intake openings, and battery terminals. A pressure washer is rarely the right tool for this job. High pressure can push water past seals that are perfectly fine during ordinary driving conditions.
For an extra-controlled method, wipe cleaner away with damp microfiber towels instead of rinsing the entire bay. This takes longer, but it is an excellent option for lightly soiled vehicles, classic cars, and owners who want minimal water exposure.
Dry Every Surface Thoroughly
Drying is where a safe cleaning becomes a polished result. Use microfiber towels to absorb water from flat panels, then carefully blot around caps, wiring looms, and crevices. Gentle air can help move trapped moisture from tight areas, but do not blast sensitive components at close range.
Remove any protective bags and inspect the bay before closing the hood. Once it looks dry, start the engine and let it idle for a few minutes with the hood open. This helps evaporate small traces of remaining moisture. Listen for anything unusual, and make sure no warning lights appear before driving away.
Finish With a Natural Protective Treatment
After the bay is dry, apply a water-based trim protectant to plastic covers, rubber hoses, and weather seals. This step revives faded surfaces, provides a more even finish, and helps reduce future dust adhesion. Apply the product to a microfiber applicator first rather than spraying it freely across the engine compartment.
Keep protectant away from belts, pulleys, brake components, electrical terminals, and painted surfaces. Wipe away excess product after a few minutes. The best finish is satin and clean, with no greasy shine and no wet residue collecting in corners.
You can also wipe the hood underside, latch area, and painted edges around the bay. These small details make a noticeable difference because they are the areas most visible when the hood is opened.
Common Mistakes That Make Engine Bay Cleaning Risky
The most common mistake is using too much water. An engine bay is not an exterior body panel, and it does not need a forceful rinse to look good. Oversaturating surfaces increases drying time and raises the chance of water reaching an already weak connector or seal.
Another mistake is cleaning without identifying active leaks. Degreaser can make a bay look better for a day, but it cannot solve a leaking valve cover, coolant hose, or power steering component. If the residue returns quickly, the vehicle needs mechanical attention.
Finally, do not use dressing as a shortcut. Heavy shine may photograph well at first, but it often traps dust and looks uneven after a few drives. A clean, dry, satin finish is the premium standard.
When Professional Engine Bay Detailing Is the Better Choice
A professional service is worth considering when the engine bay has heavy grease, neglected buildup, delicate electronics, or limited access around larger engines. It is also a smart choice if you want the area cleaned before a ceramic coating, resale inspection, or full vehicle revival.
At Ride Revivers, a premium engine bay treatment focuses on controlled cleaning, careful drying, and refined finishing at your doorstep. It gives owners the visible transformation they want without turning a valuable vehicle into a DIY experiment.
A clean engine bay should never come at the expense of reliability. Take your time, use less water than you think you need, and treat every surface with the same care you expect from the rest of your vehicle.